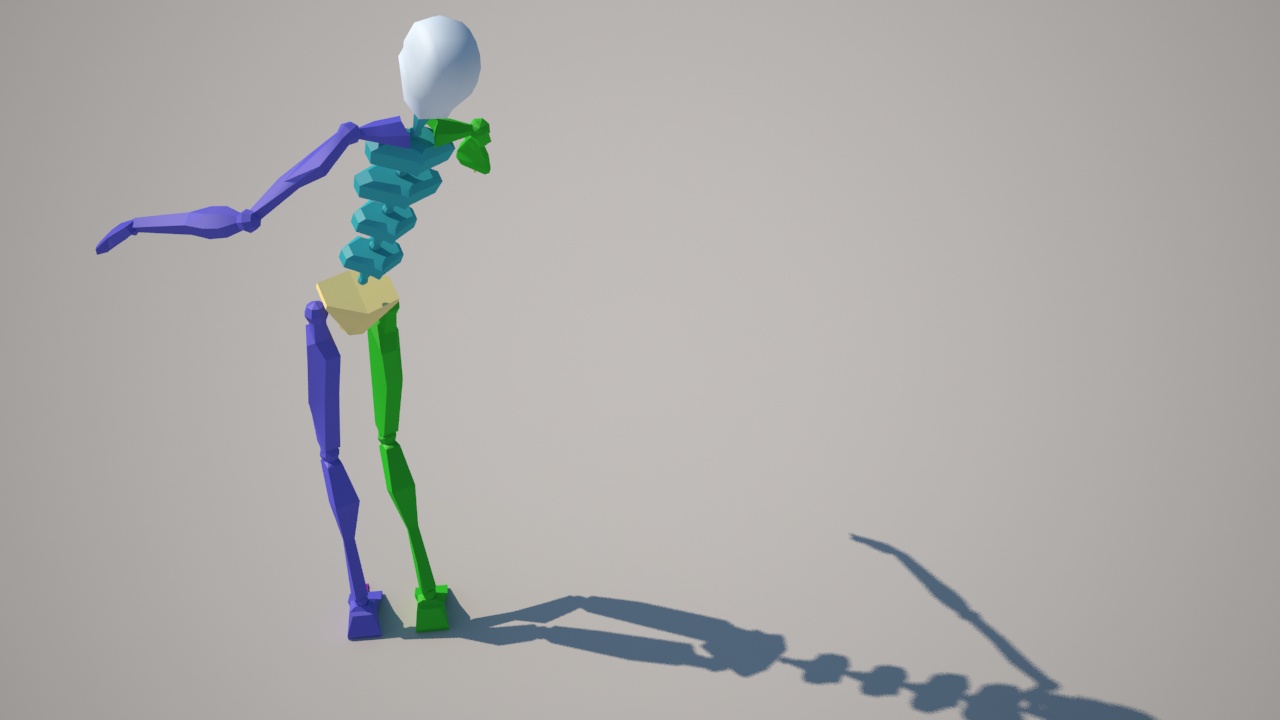
In this tutorial I explain to convert capture motion data from the Microsoft Kinect motion controller to 3ds max Biped.
What you need
- Microsoft Kinect with USB-Adapter for PC
- 3ds max 2009, 2010, 2011, 2012
- Motion Builder 2009, 2010, 2011, 2012
Download
- The OpenNI Driver
- The Brekel Kinect Driver
- or use the Auto-Installer with OpenNI and Brekel
- you also need the Brekel Kinect MotionBuilder Device Driver
Install the Drivers
- Install OpenNI first
- Install Brekel
- Install Brekel MotionBuilder Kinect Plugin
Confirm all security messages and continue.
Connect & Test
- Connect the Kinect via USB and wait for windows driver confirmation at your taskbar.
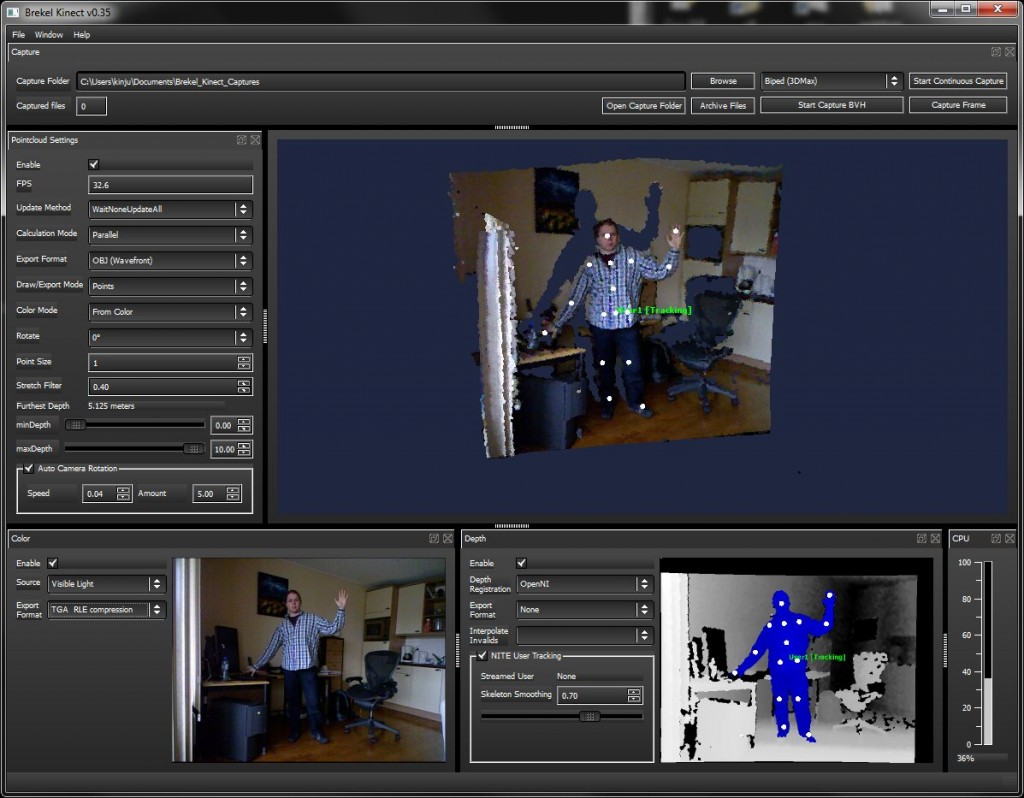
- Start Brekel (Start -> Programs -> Brekel Kinect -> Brekel Kinect). This software is a standalone software for recording motions (MoCap).
Here is an screenshot of the Brekel software:
Calibrate user
- Place your Kinect on a planar surface and horizontal to the room
- The complete user have to be visible in color mode
- Calibrate in T-Pose (unnecessary when the official Microsoft driver for PC is published)
- Don’t move until Brekel is calibrating
- The calibration was succesful when the points in 3D and Depth mode are found
- Jump around!
Recording your motions
- Don’t use the Brekel standalone tool for motion recordings, instead of use the Motion Builder Plugin.
- Start MotionBuilder
- Press Ctrl-Shift-1 for Creation Mode
- Click Devices in the Asset Browser and Drag an Brekel Kinect Device to the Viewport
- Click Online in the Navigator-Window. If a skeleton is found appears green
- Activate Live Mode
- Active Recording
- Generate an automate Model binding (Create…)
- Start your motion capture pose in a neutral pose.
- Press Recording in the Transport Controls and Play. This will start a recording called Take 001. Of course you can create more takes.
- Stop and check your recording in the timeline
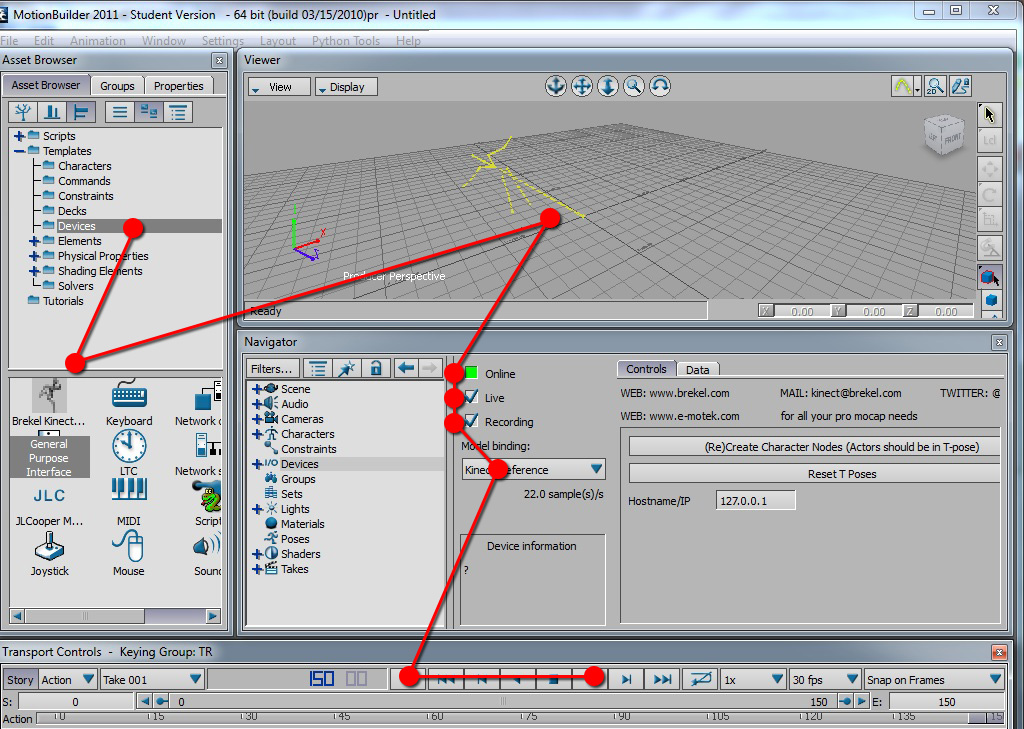 Please note: The recording FPS have to be higher than 30 fps! Brekel plugin shows the sample rate in the Navigation Mode.
Mapping Motion to an Actor
- Go back to the Characters in the Motion Builder Asset Browser
- Add an Actor to the scene (Drag and Drop)
- Search a neutral pose in your animation of your Kinect-Rig
- Now move your Actor-Root to the Kinect-Skeleton-Root
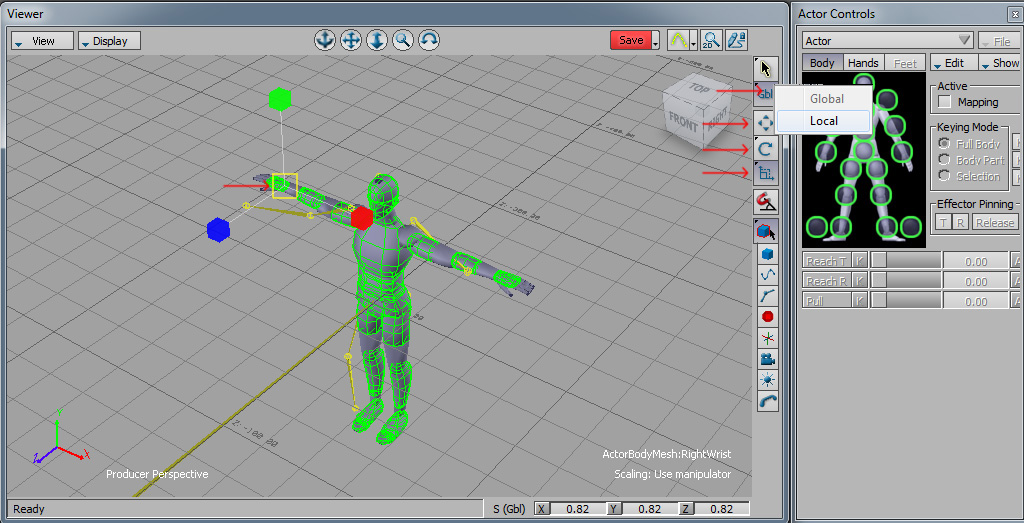
- Move, rotate and scale (Right Bar of the Viewport) the Actor by selection the limbs. You can use the Points in the Actor Controls Toolbar to select the Limbs (Press CTRL for multiple selection)
- Use the Local and Global Reference Mode for better rotations
- When all limbs are placed into the Kinects pose press CTRL-SHIFT-3 for Editing Mode
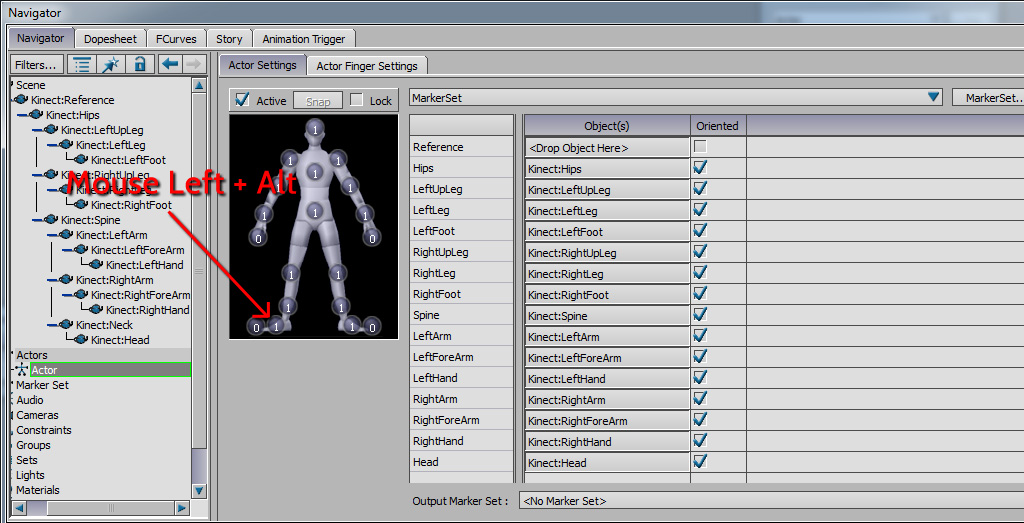
- Expand als Kinect Reference Bones in the Navigation Tree (Scene) and click on Actor
- Create a Marker Set by clicking the MarkerSet-Button -> Create
- Drag and Drop all bones of the Kinect-Rig to the matching Actors limbs using MouseLeft and the Alt-Key
- After mapping all Kinect-Bones click on the Actor-Figure and make all Objects Oriented
- Click on Active
- Move the Timeline, the Actor should follow the Kinect Skeleton
Mapping Motion to the 3ds Max Biped
- Open 3ds Max
- Make sure your Unit Scale is in Centimeter
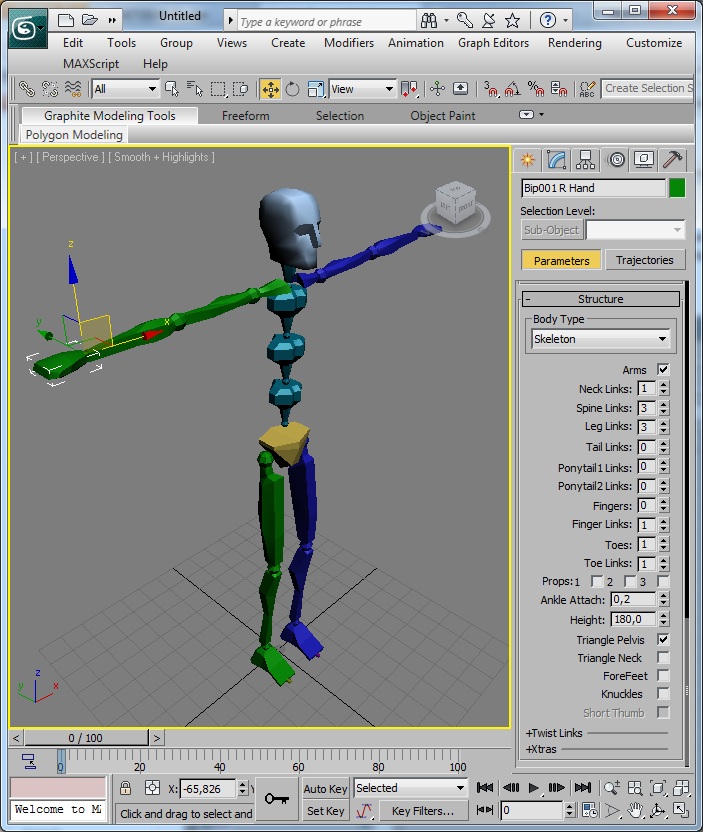
- Create a Biped (Main Menu -> Create -> Systems -> Biped)
- Go to Figure Mode (Motion-Panel) and set its height to ca. 170 – 180 cm
- Try diffent scalings when Biped size doesn’t match
- Use following Body Structure:
- Exit Figure Mode and Export the Scene to the FBX (FBX-File Format according to the 3ds Max- / MotionBuilder-Version you use)
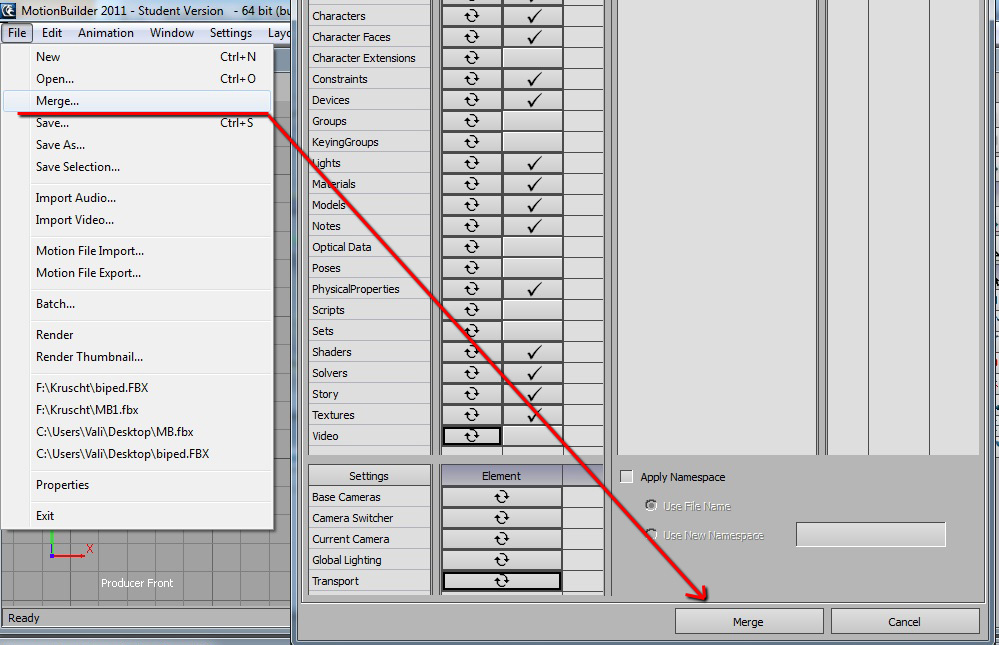
- Back to Motion Builder and Merge (File –> Merge) your FBX scene with the current Scene (save before merging)
- Click Merge
- Switch to Creation Mode (CTRL-SHIFT-1)
- Select All merged Biped-Joints
- Click Character and Drag it to the merged Biped Skeleton
- Charactize it as Biped
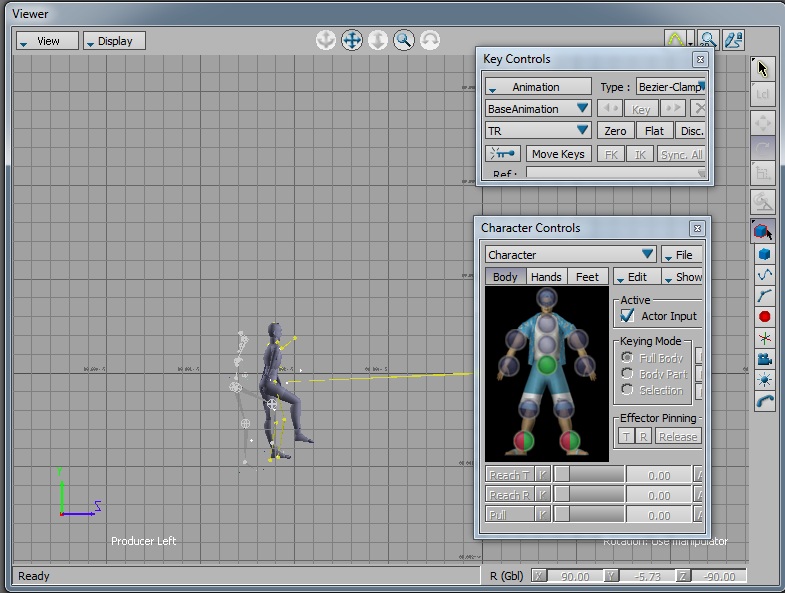
- Switch to Editing Mode (CTRL-SHIFT-3) and click on Edit in the Character Controls –> Select Input –> Actor
- Activate Actor Input
Optional
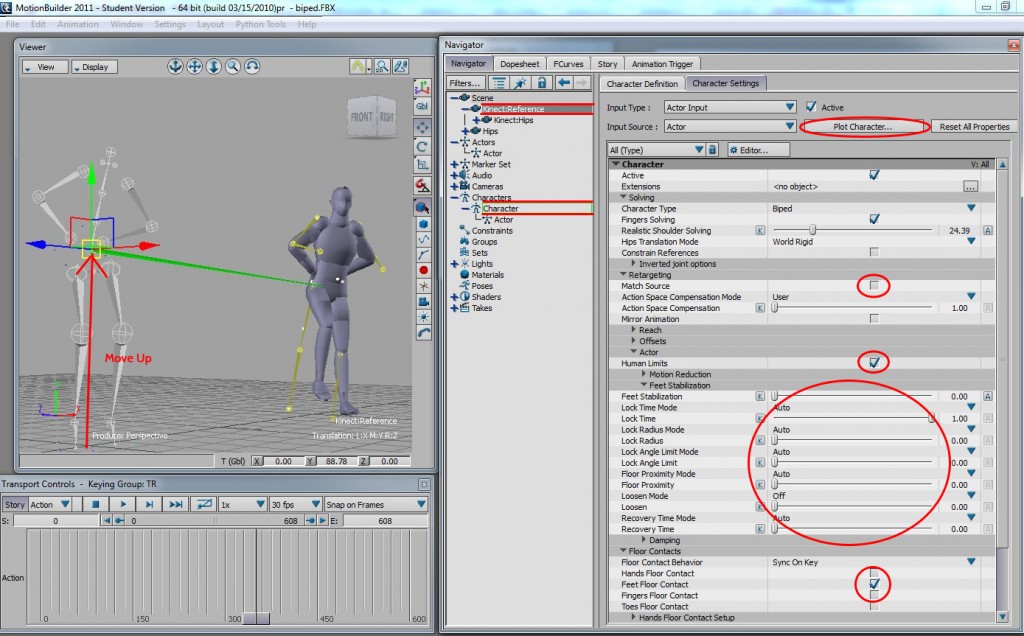
- To stabilize the feet activate Feet Floor Contact in the Character Settings Tab (Navigator Window)
- If the feet are under the ground plane (Z<0) move up the Kinect Reference Root Bone
- You can apply Human Limits to the joints by activating under Actor –> Human Limits
- You can fix your feet animation with the sliders und Feet Stabilization
Export Animation
- Plot Character –> Skeleton!
- Save your scene file (FBX)
- Back to 3ds max
- Import FBX
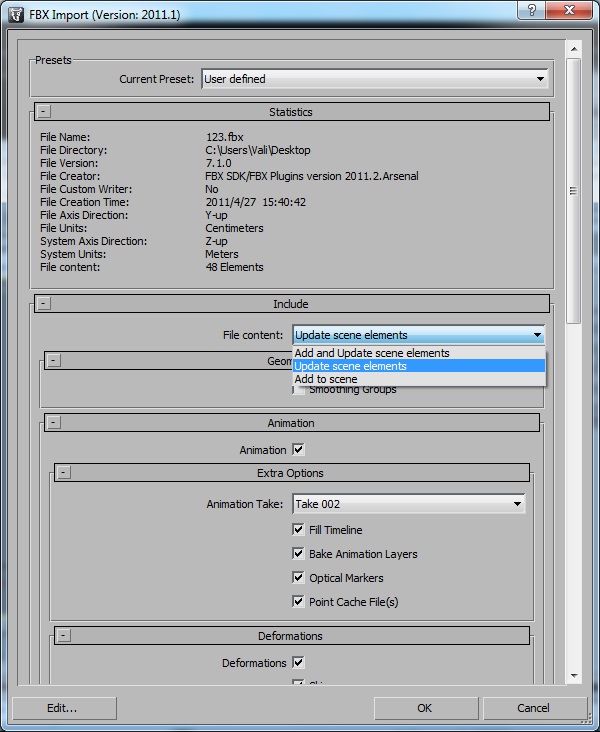
- Set your file content to Update Scene Elements in the Import Options
- Set your Take in Animation Take
- Click ok
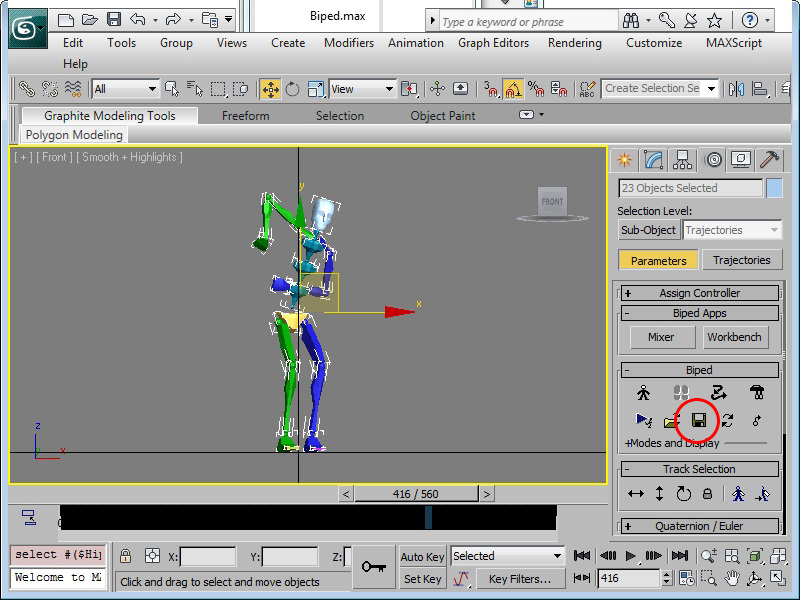
- Now you can save your Animation as BIP-file
- Thats it!
Many Greetings
Vali
